Monday, January 6, 2014

Pimientos de Padron


Thing I learned on my recent trip to Barcelona to visit Mike: there are not enough hours in the day to eat as frequently as the Barcelonese and to also earn a viable living.

From what I could tell, the workday in the Catalonian capital starts at around 8:00 a.m. but anyone who has spent long enough in its cafés knows that the city pauses for a mid-morning “snack” at 10:00/10:30 at which point its entire workforce swells into its countless establishments for a bocadillo – a Spanish baguette typically engorged with Iberian cured ham or semi-soft goat cheese.

This recess that breaks up the interminable hours between the conventional meals last a full hour and resembled more a Sunday brunch from whence I hail.

By 11:00/11:30 the fuelling is over and the Barcelonese head back to work until 1:00 (1300) when lunchtime steadfastly begins. This, of course, is not a sit-at-your-desk-and-eat-a-sandwich-while-checking-Facebook kind of lunch. Overall, observing the way in which the economy of Spain accommodated the Barcelonese meal schedule ushered me into a deeper understanding of the country's current fiscal troubles.

As for our own travellers' woes, to this day I do not know whether it was the “when in Rome” mentality or just a heavy dose of enabling but our Barcelona gang ate excessively.

While the tale of the bocadillo and the lesson I learned therefrom seemed amusing, the tapa that I predictably wanted to eat every time we sat down was the plate of pimientos de padron or padron peppers.

Padron peppers are quintessential to any Barcelona tapas menu. They are small green peppers, fried and doused with flakes of sea salt. There is not much more to say.


I loved them. And thanks to my equally enthusiastic friends, I never had to take a lunch break, coffee break, water break, beer break, wine break or even rest my legs without them.

Shout out to Aivi, Katie, Jay, Mike, Milvi, Pete and Shayna.

and the photos aren't mine.

Sunday, February 17, 2013

Rice, French Fries, Macaroni and Fried Egg


During the year that I lived in Ecuador, Maya and I spent a month travelling through Bolivia and, unexpectedly, a full week in the country’s capital, La Paz. This having taken place a while ago, my memories are no longer well-defined. To my horror, not even a scan of my Andean upholstered pre-digital photo album could summon so much as murky images of the food … or the month at all for that matter.

I do, however, unaidedly remember the hostel at the top of the vertical road, the daily market in the plaza at its base and the complimentary tour of the McDonald’s kitchen - which we just could not turn down - on which the kitchen staff distressingly boasted the Canadian origin of all the McBolivian fries.

The only consumption that was effectively ingrained was - for reasons which require no further explanation – the oft repeated almost-all-starch-meal of rice, french fries, macaroni and fried egg. This motley crew is one of the great combinations served at 4,000 metres above sea level and we ate it regularly in the market at the foot of the hill.


While I appreciate that preparation does not conjure even a crumb of culinary prodigy, I take off my hat to the visionary to whom I am indebted for what I can only imagine was initially received as a brazen and unorthodox combination.

I did not make the pasta from scratch, so anyone who needs a recipe for anything beyond the fries should probably not be attempting this dish.


French Fries:

Ingredients:

• potatoes
• oil
• thyme
• salt

Directions:
• Pre-heat oven to 375
• Cut potatoes into fry-like slices
• Soak the uncooked fries in an ice-water bath to release some of the starch
• Bake for around 40 minutes although depending on the quantity and the thickness of the fries you may need more or less.

Wednesday, November 21, 2012

Montreal Bagels, Cream Cheese and Gravlox


It’s challenging for me to figure out where I want to go with this post; I’ve been to Montreal just so many times. Meals in Montreal have been shared with family, friends, text books and magazines on so many occasions over so many years that the memories of the poutines, vegan BLTs, pizzas and matzah balls have become indiscernible one from the next.


There is Peking Garden, the Chinese restaurant on Queen Mary Boulevard near my grandmother’s old apartment. We used to eat at Peking Garden with my grandmother, uncles, aunts and cousins on every visit to Montreal when my grandmother was alive. The spring rolls were enormous. Practically a meal. My grandmother passed away when I was 8 and I haven’t been to Peking Garden since but I remember those spring rolls as the best I’ve ever had.


There is also Solly’s, the understated Cote-St-Luc deli where we invariably stop on our way out of town to stock up on cylindrical tubes of gefilte fish for the car ride home. The demand is high as the fish serves to stave off extreme restlessness on our traverse of a notoriously uninspiring strip of pan-Canadian highway. Some people count punch buggies.


As there are stars in the sky, so are there infinite stock images of gefilte fish on the internet.


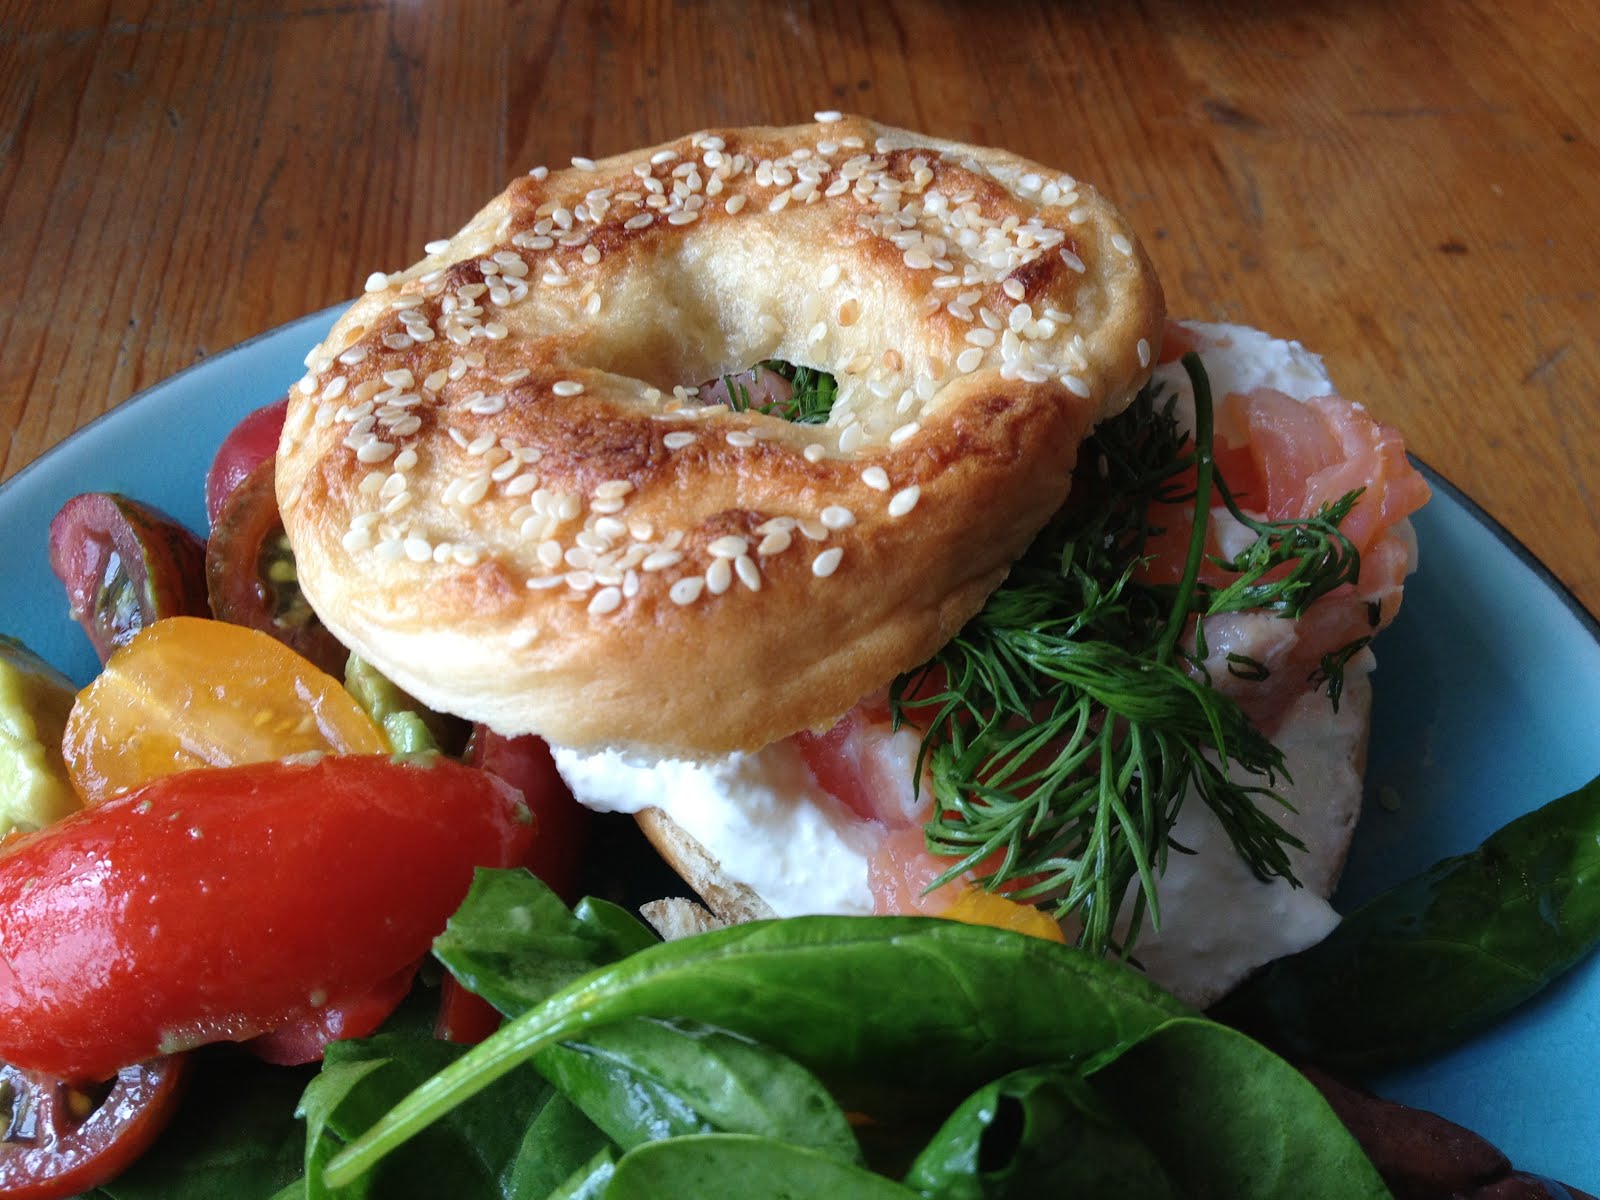
Then there are the bagels. I adore Montreal bagels and the process of procuring them: the dense, bland, sweet dough; the Sunday morning line at St. Viateur bakery; the brown paper bag still radiating the heat acquired from the wood-fired oven. Cream cheese and lox in tote, Olympico latte in hand, the ritual is part of the reward.


All 3 meals equally scream My Montreal as do many more. Inspired by my cousin Ellen’s hospitality, her beautiful Mile End flat and her proximity to St. Viateur - home of great bagels and the best smoked-salmon spread around, I’ve made bagels, cream cheese and gravlox. It’s true, smoked salmon and gravlox are not the same thing, but until I master stove-top smoking this is as good as it gets.


RECIPES

Montreal Bagels


www.food.com/recipe/montrea-bagels-35261

Ingredients:
• 1 ½ cups warm water
• 5 tablespoons sugar
• 3 tablespoons canola oil (I used sunflower oil)
• 1 package (8 grams) dry yeast
• 1 tablespoon beaten egg
• 1 tablespoon malt drink powder or 1 tablespoon malt syrup
• 4 ½ cups unbleached white bread flour (possibly more)
• 1 teaspoon salt
• ½ cup poppy seeds or sesame seeds or both
• 6 litres water
• 1/3 cup honey

Directions:
• In a large bowl, stir together the warm water, sugar, canola oil, yeast, egg and malt; keep combining until the yeast dissolves. Then, stir in salt and one cup of the flour
• Gently add enough flour to make a soft dough, about 3 cups
• Knead your dough for 10 to 12 minutes, stirring in extra flour as you need it. When your dough is firm and smooth, cover with inverted bowl and let sit 10 minutes
• Next, divvy up the dough into 12 equal pieces. Roll each piece into a 10-inch rope, then curve each one around your hand, pressing together ends to make a bagel shape. You may need to use a few drops of water to help the ends stay together
• Let bagels rise for 30 minutes
• When ready, fill a large pot with the 6 litres of water and then stir in the honey; bring that to a boil.
• Meanwhile, preheat your oven to 425 degrees F and line 2 baking sheets with parchment paper.
• When the honey-water has come to the boil, drop in the bagels and boil for about 90 seconds turning only once. Drain your bagels on clean, dry dish towels and then place on baking sheets. Sprinkle both sides of bagels with seeds.
• Place your bagels in preheated oven and bake until golden in appearance, about 20 minutes, turning just once.


Gravlox:

Recipe is care of Mark Filipczuk

Ingredients:
• chunk of good quality salmon
• 2 bunches of bushy dill
• lemons or limes and/or tequilla
• kosher salt, fresh ground pepper, brown sugar

Directions:
• rinse fish and pat dry
• rub fish with lemon or lime juice
• make a mix of 1/3 salt: 2/3 sugar and rub all over fish.
• crush black pepper (to taste)
• in a big glass dish, make a dill blanket along bottom. Place fish on top and then cover with another layer of dill.
• put something heavy on top to press the fish.
• Let marinate for about a week in the fridge.
*if you do tequilla, just do it with the lemon.


Cream Cheese

The recipe is Ricki Carroll’s, a Vermont cheese-maker, and is found in her book Home Cheese Making.

Ingredients:
• 4 litres of light cream
• 1 packet of direct-set mesophilic starter or 8 tablespoons prepared mesophilic starter.
• Cheese salt

Directions:
• Bring cream to room temperature (22 degrees celsius). Add the starter and mix thoroughly.
• Cover and let set at 22 degrees for 12 hours. A solid curd will form.
• Pour the curd into a colander lined with butter muslin. Tie the corners of the muslin into a knot and hang the bag to drain for up to 12 hours, or until the bag stops dripping and the cheese has reached desired consistency. Changing the bag once or twice will speed up the draining process.
• Place the cheese in a bowl and add the salt.
• Place cheese in small molds and cool in the refrigerator.

Sunday, September 16, 2012

Kastengel


My four day introduction to Amsterdam in April, where I reunited with friends from the New York days, had me in complete awe. The canals, the bikes, the tilted homes all squished together, the streets of brick. It seemed like humanity had been reckless in not having, some time ago, named the whole city a United Nations World Heritage Site to be cordoned off and experienced only by advanced purchase tickets of self-guided audio-tours narrated by Patrick Stewart and Jane Fonda. But instead people walk around, go to work, buy coffee and ride trams. Like it’s no big deal.

While I was captivated by the physical city and its physical history, I wouldn’t be writing this today if I hadn’t also taken notice of the food – made possible by my cohort of willing and eager companions and my unwavering ability to sit at canal-side cafés.

On my first night in town, Suzanne showed me the canal-free neighbourhood of De Pijp which I admired through the rain drops from the back-rack of a Dutch 3-speed. To add to the Dutchness of the evening, I wore the dress that I had bought that day in the charming neighbourhood of Jordaan which was made in the Philippines. When we settled in for our pre-dinner drink, we ordered the quintessential Dutch bar snacks: bitterballen and kastengel.


Bitterballen are what I would describe as orbs of deep fried roux specked with flakes of you-name-it-but-probably fish. I say that because if I had to choose one steadfast constant in Dutch cuisine it would be fish; during my four day communion with the city, I managed, without trying too hard or really at all to eat cured whole herring on a bridge over a canal just like that lady in that photo below, slices of that same herring with bread-and-butter pickles and diced onions - photo visual provided in case this is conceptually hard to grasp, battered deep fried pellets of cod, grilled whole fish, fish in sauce and apple pie. You may think that I have drawn a contrived conclusion from a series of uncanny coincidences and perhaps you’re right. After all, I did eat bitterballen again at a canal-side café with Annika, Jay, Maria and Nanna and that time some of the balls were infused with Gouda.


Which leads me to Kastengel: I don’t remembering eating kastengel that night but I know that I did thanks to my food journal. Kastengel are probably one of the only fish-free items on any Dutch menu (not really!) and are, well, cheese sticks made from Gouda. At the risk of asserting yet another unempirical claim, Gouda seems to be the national pride of the Netherlands. The Netherlands has, and successfully so, built a tourism industry around that cheese. There is even an airport shop almost exclusively dedicated to its sale.


So there you have it: fish or cheese. I went with cheese.

The kastengel recipe I found online gave all measurements in grams. Still no food-scale-the-wiser, I used a suspect online conversion program which I’m starting to think is really just a bunch of teenaged programmers trying to ruin people’s food.


Did the conversion work? That depends on your outlook on life. The biscuits turned out to be savoury shortbread. With no memory of eating them, I have no idea if they were supposed to be. Also, they became very crumbly when left on the counter. I don't know if I can blame this on the conversion programme or not. But it didn't really matter; they tasted great and did remind me of a beautiful place and a great trip.


Kastengel
http://www.food.com/recipe/kaastengels-cheese-shortbread-276847

Ingredients
• 125 g salted butter = between ½ and 2/3 cup of a cup.
• 2 egg yolks
• 25 g cornstarch (1/4 cup?)
• 150 g all-purpose flour (1 and ¼ cups?)
• 100 g grated matured edam or gouda cheese (1/2 cup)
• 1/4 teaspoon baking powder
• For garnish:
• 50 g grated cheddar cheese
• 1 egg yolk

Directions

• Mix butter and egg yolks with a mixer then add the grated Gouda or edam.
• add the flour, cornstarch and baking powder.
• Roll the dough and cut into small rectangles about 1x3 cm.
• Preheat the oven to 350°F and place rectangles onto grease trays.
• Brush each one with the egg yolk and sprinkle with grated cheddar.
• Bake until done about 15 minutes.

Tuesday, June 19, 2012

Ottolenghi


I’ve been obsessed with the food of London-based Israeli chef Yotam Ottolenghi since Karina introduced me to his second cookbook, Plenty, several years back. We actually made a couple of recipes from Plenty at that fateful New Years Eve party you may recall from my post on beef stroganoff. Since then, I have acquired the complete Ottolenghi collection, being two cookbooks, and love them so much that I am willing to stick out the gruelling conversion from grams to cups - which I do without a scale - and which always makes baking a little bit more of a thrill-seeking event.


While falling for the two hardcovers, I was not blind to the fact that Ottolenghi's notoriety pre-dates the written word and originated with his café in Notting Hill, which quickly turned into four cafés speckling sprawling London. And so, when my sister and I went to London in April to visit our brother who had recently moved from Shanghai, all three of us knew that the trip was in no small part also a pilgrimage.


In anticipation of our voyage, my sister graciously plotted the Ottolenghi cafés on the communal google map. And as it is when it is written in the stars, our brother lives but a skip from the café in Islington.


My first morning in London, before my sister arrived, my brother dropped me at the café as a parent would a child at daycare. Neither of us were sure if he would be picking me up at the end of the day but, after a sublime breakfast where I could not choose and so ordered both, to my surprise I left. I think getting the double-chocolate chip cookies for the road made leaving the café bearable.


Islington was only the beginning. A couple of days later, after exploring Portobello Road, my sister and I "found ourselves" at the Notting Hill café where we savoured a selection of earthy salads teeming with nuts, grains, greens and roots. Here's a mediocre at best photo of that meal which I promise was not taken with the blog in mind.


And but a few days later we transported an Ottolenghi picnic to Hampton Court, the Tudor castle, where we sat on a bench in a 700 year-old courtyard and ate the dregs of what we weak-willed women hadn’t already eaten on the 25 minute train ride out of town immediately following breakfast.


It may sound like all we did in London and its peripheries was eat Ottolenghi, but we actually diversified quite a lot. We compared the dolphin-friendly tuna sandwich at “Pret-a-Manger” with that at “Eat”, Cornish pasty with pot pie and overwhelmed ourselves so with our lunch options that it sometimes felt that the weight of the world was on our shoulders.

We were so prolific in fact that at first it didn’t even occur to me to post on Ottolenghi. But when my family came over for Mother’s Day lunch, for which I had prepared a table full of Ottolenghi salads, I finally saw what had been before my eyes all along.


Let me walk you through these salads in just enough detail to leave you intrigued. We had (1) squash with cardamom and tahini-yogurt dressing, (2) pearl barley with allspice, pomegranate and dill, (3) a quinoa, fava beans and avocado salad, (4) a lentil, celeriac and hazelnut salad, (5) a salad of cabbage, kohlrabi, sour cherries and dill and (6) mixed green beans with a tahini sauce.


I feel a bit funny posting recipes from Ottolenghi’s cookbooks and so out of respect for the artist, genius and entrepreneur I won’t. But when you become desperate - and you will - you know where to find me, the cookbooks and the cafés.

Saturday, April 14, 2012

Pupusas

In February I travelled to Honduras with a volunteer Canadian medical team to provide health care to people living in the very rural and very poor mountains outside the city of Gracias.


Given the nature of the trip, eating in Honduras was not as laden with adventure as my travel-eating experiences often are. Since Honduras is such a dangerous country, and because there was some expectation that the non-profit through which we were volunteering would deliver us home alive, we did not have free time to walk around and explore. Also, since water in Honduras is admittedly incompatible with the Canadian digestive system, and since rampant stomach flu would have derailed our stated purpose, a “no-street-food” policy was implemented.


The combination of security and health concerns resulted in fairly controlled and predictable eating. Other than the plantain and yuca chips, Hershey’s Kisses and Pringles that we bought on supervised and armed trips to a little grocery store, and other than a fantastic buffet at a highway rest-stop, at which the variety knew no bounds and the breaded deep-fried chicken left an indelible memory, our meals were not particularly varied.


That does not mean that the meals were not tasty. They were! And I will never tire of avocado, sweet plantain (maduro), queso fresco, refried beans, rice and tabasco sauce.


I did eat street food on one never-before-disclosed afternoon: no sooner were we left to our own devices that singular time, in the charming mountain town of Valle de Los Angeles, did Leigh and I find ourselves eating a pupusa that we had bought from a man with a grill by the side of the road. We responsibly declined the typical accompaniment of coleslaw and home-made hot sauce (you know, the water thing) and, amidst the colourful homes, cobblestone and previously-loved tuk-tuks, enjoyed what we hoped would not be the meal to topple the brigade. While our team was not exactly immune to the ailments that can afflict travellers, I am relieved to say that pupusa was not the source of any trauma or collective delay.


Pupusas are patties of masa harina typically stuffed with some combination of refried beans, queso fresco and meat and are served with coleslaw and hot sauce. They, I believe, were first stuffed in El Salvador but are definitely eaten in Honduras, Nicaragua (thanks, Anibal) and possibly elsewhere in Central America.


Pupusas are remarkably easy and quick to make. The only time-consuming component was preparing the refried beans (not fried!) which, like all beans, need to cook for a few hours - a major shortcoming of beans but at the very least something that can be done ahead of time.


I don’t have any pupusa-making disaster stories. I suppose my pupusas weren’t as flat as pupusas “normally” are (see picture of a flat pupusa), but this might just be one of those things that comes with practice. Leemor and Andrew certainly weren’t complaining and I got over it pretty quickly.


Pupusas

Ingredients:


Here’s a list of all the ingredients you need to make papusas. Recipes below.

• 2 cups masa harina
• Queso fresco
• 2 or 2.5 cups dried pinto beans
• 1 cooking onion
• Cumin
• Olive oil or any other oil
• 2 tomatoes
• 3 shallots
• one of those skinny red hot peppers
• cilantro, handful
• lemon juice, 1 tablespoon
• Sea salt
• Cabbage, any kind
• Oil - avocado, grapeseed or sunflower (something with a mild flavour).


Refried beans

Ingredients:

• 2 or 2.5 cups dried pinto beans
• 1 onion
• Cumin
• Olive oil or any other oil
• Salt

Directions:
• Soak pintos over night.
• Boil the beans for 3 hours.
• Fry 1 large onion until clear.
• Blend all ingredients in the food processor.


Salsa


Ingredients:

• 2 tomatoes
• 1 shallot
• 1 of those skinny red hot peppers
• Cilantro, to taste
• Fresh lemon juice, 1 tablespoon or to taste
• Sea salt
• A little bit of water

Directions:
• Blend in food processor.


Super Simple Coleslaw

Ingredients:

• Cabbage, any kind, shredded
• 1-2 shallot, shredded.
• salt
• Oil - avocado, grapeseed, sunflower or any other mild-tasting oil.

Directions:
• Shred the cabbage and shallots, mix together in a bowl with salt.
• Put oil on the table in case anyone wants to use it.

Pupusa Dough

Ingredients:

• 2 cups masa harina
• 2 cups of water (the recipe said 1 cup but I found it wasn’t enough – the dough was too dry and brittle and I couldn’t flatten the pupusas without them cracking)

Directions:
• Mix the flour and water together and make into a ball of dough, knead a bit if you like. If you’ve read any of my past posts you’ll know I hate kneading.
• Divide dough up into 8 pieces.
• Roll each piece into a ball.
• Using your finger poke a hole in the ball and make a pocket.
• Stuff the pocket with beans and shredded queso fresco.
• Close the dough around the pocket and flatten.
• Fry in a greased frying pan for 3-4 minutes per side.
• Put pupusa on a plate, place coleslaw and hot sauce on top and serve.

Wednesday, March 7, 2012

Stroganoff

When I was in Brazil last year visiting Su and Vivi over carnival, a certain dish etched a lasting memory: the stroganoff served at the popular and ubiquitous by-the-weight buffet restaurants of Rio. Unlike the conclusion you may be drawing, these by-the-weight restaurants are not places of last-resort and they don’t look anything like the buffets of Orlando that you may be envisioning. Rather, they are desired, and not necessarily cheap, eateries that serve really good food. For better or for worse, my most memorably delicious meals in Rio were eaten at by-the-weight buffets.


I would venture to say that stroganoff is not, at first blush, associated with Brazil. I’m also taking the brazen position that the stroganoffs of Rio are not the most authentic but rather an Ibero-American adaption of this Russian classic, where dumplings are exchanged for rice and sour cream for whipping cream among other creative twists such as the addition of condiments. Authentic or not, that thick, rich sauce was so unbelievably good that it had me doubling back to the chafing dish.


Stroganoff is curiously beloved in Rio. Rachelle told me that she actually noticed it on menus all across the country and I learned anecdotally while doing my research that fast food chains in Brazilian shopping malls even offer this high-demand dish http://jv-foodie.typepad.com/foodie/2008/03/brazilian-strog.html. Rachelle is trustworthy so I don’t think fact-checking her contribution is necessary.


My love of stroganoff did not start in Rio. It was, however, rekindled there. I had the good fortune of eating Milvi’s mom’s stroganoff in Golden, British Columbia, circa 2005/2006, on a beautiful and challenging ski trip. The dish was exquisite and I’ve been sitting on the recipe ever since. Milvi is Estonian (some politically incorrect people might say that’s close enough to Russian) but unconfirmed rumours say that her mom found the recipe in The Joy of Cooking. I guess we’ll never know.


What happened next in the stroganoff saga is that Karina and I made that revered recipe on NYE a couple of years ago. As I have never done before or since, we burned the stew so severely that it was unsalvageable. I even had to throw out the pot. The experience was so traumatic and so wasteful that I swore I would never eat or make stroganoff again.


Well if I’ve learned anything from stroganoff it’s that life is long and sentiments ephemeral. In a tribute to Rio, Golden, New Years Eves and the complex mixture of joy and sorrow that is life, I’ve made Milvi’s mom’s stroganoff and Brazilian stroganoff. The Brazilian one was a complete afterthought since I didn’t even realize that such a recipe actually existed beyond in my dreams until about an hour ago.


While my memories of Brazilian stroganoff are fond, the traditional recipe is by far the better, although what with my terrible photos this month it’s hard to tell. The traditional stroganoff is actually sensational. I really encourage you all to make it. If you don’t eat bacon or beef or combinations of meat and milk, find some substitute (liquid smoke and tofu?) or make some other creative modification. Su told me that unripened breadfruit is used as a meat substitute in Brazil – for those of you in Toronto this might be your best bet since breadfruit is so easy to come by here. Once you’ve sorted out your dietary restrictions you’re in the clear: the recipe is fairly easy - making my tale of burnt pot all the harder to understand - and I can’t imagine your end product could taste bad.

Beef Stroganoff (Milvi’s Mom)

Ingredients


• 1/4lb bacon, cut in ½ inch pieces
• 2lb stewing beef, trimmed and cut in 1-inch cubes
• 2 cloves garlic, minced
• 2 onions, chopped
• ¼ tsp each dried thyme and marjoram
• 3 cups beef stock
• 1 cup dry red wine
• ¼ cup ketchup
• 1 tbsp brown sugar
• 1 tsp Worcestershire sauce
• ¼ cup all purpose flour
• ½ lb mushrooms, sliced
• ½ cup sour cream
• 2-3tbsp butter
• 1 tsp salt
• Freshly ground pepper

Directions

• In large heavy saucepan over medium-high heat, cook bacon until softened.
• Add beef cubes; cook, turning to brown on all sides.
• Stir in garlic, onions, thyme, and marjoram; cook for 5 minutes, stirring often.
• Pour in stock; bring to boil, stirring constantly.
• Stir in wine, ketchup, sugar, and Worcestershire.
• Reduce hear to simmer and cook, covered, for 1 hour or until meat is tender.
• Blend together flour and ¼ cup of cold liquid (water, broth, or wine) shaking really well, and add a few spoonfuls of the warm broth before putting flour mixture into the stew.
• In skillet, melt butter, cook mushrooms for 4 to 5 minute, stirring occasionally.
• Stir into stew along with sour cream, salt, and pepper to taste.
• Transfer stew to 12-cup (3L) flame proof casserole if planning to top with pastry or biscuits. (recipe can be prepared ahead to this point and refrigerated for up to 2 days).
• Bring stew to simmer, stirring gently, and top with dumplings, pastry, or biscuits.
• Alternatively, just serve with mashed potatoes or pasta.


Brazilian Stroganoff

I got the foundation for the Brazilian stroganoff recipes at http://www.maria-brazil.org/brazilian_strogonoff.htm and http://jv-foodie.typepad.com/foodie/2008/03/brazilian-strog.html. I’ve changed a few things like “catsup” to “ketchup” and “heavy cream” to “whipping cream” and added tomato paste.

Ingredients
• 2-4 lbs beef or chicken (if using beef they recommend filet mignon)
• 1-2 garlic cloves, minced
• 1 medium onion, finely chopped
• salt to taste
• 1/2 tsp nutmeg
• 1/2 to 3/4 tsp dry oregano
• dry white wine (optional). 1 cup? 2 cups?
• 1 – 1.5 cups whipping cream or Brazilian creme de leite
• 5 tbsp ketchup
• 3 tbsp yellow mustard
• 4-6 tablespoons tomato paste

Directions
• Cut up meat into 1-inch pieces.
• Put into a bowl and mix with garlic, half of the onion, salt, nutmeg, oregano and wine. Let it marinate for 1 hour.
• Sauté remainder with a bit of oil.
• Add meat/chicken and marinade to the pan and cook.
• If it is a bit dry, add a few tablespoons of water, and cook a little while longer. Then add ketchup, mustard and tomato paste. When ready to eat, add cream and let cook for one minute.
• Serve over white rice. (you can see in the photo I used wild rice).

Wednesday, January 18, 2012

Molé

Maya and I backpacked in Mexico what seems like a long time ago. We had a really great time. We dined daily on street food, sharing every edible morsel and every serendipitous culinary high. Of the highs was corn-on-the-cob slathered in mayonnaise, dusted with chili powder and drizzled with lime juice. We affectionately dubbed the mayonnaise, which festered in large vats under the could-very-likely-spoil-mayonnaise-Mexico City sun, the “salmonella mayonnaise”. We thought this was funny, largely, I suppose, because it didn't make either of us sick. At least we don't think it did.


We also ate a strict diet of nothing but animal crackers, or animalitos, for 24 hours while stuck on a bus that took a very wrong turn somewhere between Mexico City and Oaxaca and refused to pull over for food or anything else. In some ways this was a low, in other ways a high. It's complicated.


My pivotal brush with gastronomical ecstasy was definitely molé. Molé is a sauce of ground nuts, spices, chilies and bitter chocolate. It is the one food I ate in Mexico that I have since sought out with a religious-like zeal.


But finding a truly satisfying molé in Toronto over the years has not always been easy. If on the menu at all, it is often sparingly drizzled over enchiladas, when in Mexico it was lavishly poured over chicken and rice. Otherwise, it is really expensive, when in Mexico, while I don’t remember anymore, it must have been cheap otherwise we wouldn’t have eaten it.


In making molé, I didn’t follow any one recipe. As a starting point, I looked to the Everything Mexican Cookbook, which you do not need to run out and buy unless you too can find it on sale for $5.00 at BMV. I also relied on the wisdom (read: chili recommendations) of my favourite bulk store owner in Kensington. Then I added veggie broth instead of chicken broth, a slew of different nuts, ignored all quantities, probably tripled the chocolate (I’d know for sure if I even knew now what an “ounce” was), and added this Mexican chocolate in the picture here,


which is sweetened, instead of unsweetened/baker’s chocolate.


And it should come as no surprise that I found the molé to be too sweet (and so did Maya). It wasn’t that sweet, and was still good, but part of the complexity of molé is that it is a spicy and savoury chocolate dish. I do believe, generally, in upping the chocolate quantities in recipes that call for baker’s chocolate (we can discuss my unsweetened chocolate loaf another time), but I would rarely suggest increasing the sugar in any recipe unless in an attempt to convert the product into a preserve.


As you can see in the photos above, my molé is more stew than sauce. I’ve stopped serving it on chicken because I just don’t see the point. It’s thick and flavourful, rich and nutty, and stands on its own. But feel free to add chicken or anything else that you want.


You may also think that my photos look weird and that maybe molé is gross. I say, wrong. And look at this photo of someone else's molé that I found online. A ridiculously horrible call on that person's part. But I'm sure that even his/her molé is delicious.


Molé

Ingredients

• 2 guajillo chilies
• 2 pasilla chilies
• 2 morita chilies
• 2 ancho chilies
• 2 mulato chilies
• 1 large onion
• 1 garlic clove
• 1 can of tomatoes
• ½ cup salted peanuts
• 1/3 cup raisins
• ½ cup almonds
• 1/3 cup cashews
• 2 tablespoons sesame seeds
• ¼ cup oil
• 1 tablespoon sugar - optional
• ¼ teaspoon anise
• ¼ teaspoon ground cinnamon
• ¼ teaspoon ground cloves
• ¼ teaspoon ground coriander
• ¼ teaspoon ground cumin
• 1 cup chicken stock/veggie stock
• 2-4 ounces (or more) unsweetened chocolate
• 1 teaspoon salt
• 1 teaspoon pepper


Directions
• Remove the stems and seeds from the chilies. Peel and quarter the onion and garlic.
• Blend chilies, onion, garlic, tomatoes and juice, peanuts, almonds, cashews, raisins and sesame seeds in food processor until you get a thick puree.
• Heat oil on medium heat in a pot. Add the puree and cook for approximately 5 minutes, constantly stirring. Stir in the sugar (optional in my opinion), anise, cinnamon, cloves, coriander, cumin and stock. Bring to a boil. Reduce heat to low and simmer uncovered for 20 minutes.
• Add chocolate and continue to simmer, stirring constantly.
• Season to taste.
• Serve on rice as is or toss in some shredded chicken.

Monday, December 26, 2011

Pizzoccheri Valtellinesi (Pizzoccheri of the Valtellina)

You may recall from one of my earlier posts that a few years ago I visited Su and Vivi who were, at the time, living in Mandello del Lario on Lake Como. Like the good friend and foodie that Su is, she had carefully crafted a food itinerary for me including her favourite mountain-top restaurant at the summit of a narrow, steep and windy mountain road, Vivi’s eggplant parmigiano and pizzoccheri.

Pizzoccheri is what I would call a traditional northern-Italian comfort food. It’s essentially buckwheat pasta, potato, butter, cheese, cabbage, sage and garlic. It hails from the Valtellina, a valley in the Lombardia region - a bastion of blonde, fair and blue-eyed Italians who look and act more Swiss than they do like the dark and swarthy Italians of my misperceptions.


I ate pizzoccheri in the Valtellina town of Bormio, where we spent 4 days skiing, eating and sitting in thermal baths. I’d never before set foot in a ski town that in more ways than not resembled the days when the Roman Empire was … an Empire. It was spectacular and surreal.

To be precise, I actually ate the pizzoccheri (and Su something equally as heavy) for lunch at the top of the slopes. Not everyone would encourage eating a dish that has the effect of horse tranquilizer on the body while skiing. And in hindsight, I’m not sure I would either. The good news was that, as it turned out, skiing in Bormio was just sun-tanning at a slope-side restaurant with a glass of wine. Any type of vertical movement that capitalized on gravity was basically a different hobby all together and so, to the extent that Su and I recklessly guided ourselves in semi-comatose states down the mountain after that meal, we really didn’t endanger anyone but ourselves.

On a side note, Su also had the foresight to encourage me to shamelessly smuggle food back home to Toronto. I literally had small wheels of cheese stuffed into my ski boots among the dried porcinis, olive oils and wines that littered my backpack. I lost a sausage, which was en route to my dad, to American Customs but, remarkably, everything else survived the voyage to the New World.

In case my tale wasn’t clear, pizzoccheri is a fabulous, and extremely heavy, dish. This is not to deter you from making it, because you won’t regret it, but also know it’s the kind of meal I would suggest making before settling into a cozy evening of Italian beauty pageants on OMNI or your equivalent local television network, wherever in the world you may be.


THE RECIPE

My pizzoccheri recipe is a hybrid of a few I found online and my own improvisations. I looked to Mark Bittman’s recipe http://www.nytimes.com/2008/12/31/dining/311mrex.html

as well as that of this lady at Delicious Days http://www.deliciousdays.com/archives/2007/02/16/pizzoccheri-della-valtellina-embracing-comfort-food

and to this one http://www.grouprecipes.com/4593/pizzoccheri-valtellinesi.html

and to this one http://fxcuisine.com/Default.asp?language=2&Display=87&resolution=high


BUCKWHEAT PASTA

Ingredients

If you check out the recipes, you’ll notice extreme mixed-messages as to the buckwheat flour-to-all purpose flour-to-water ratios. I made up my own ratio and it worked out well.

• 2 cups buckwheat flour
• 1 cup all-purpose flour
• ¾ cup warm water

Having said that, if you combine these ingredients and for some reason don't get a dough, add water until you do.

Directions

• Mix ingredients together until you get a dough
• I didn’t roll out the dough it seemed like way way way too much work. I instead flattened little balls of dough into pancakes with my fingers and threw them into the water.
• You of course are free to go the distance with a rolling pin but I was happy with the outcome.

I’m giving you a few photos of other people’s pizzoccheris so you can see what it looks like when you don’t laze-out and actually roll the pasta.


THE REST OF IT

Ingredients

• 6-12 leaves fresh sage, chopped
• Almost a full head of savoy cabbage or in hindsight a full head
• 2 small potatoes, small cubes
• 1 stick of unsalted butter
• 3 cloves garlic, minced
• 1 cup fontina cheese, grated
• 1 cup parmigiano, grated

Directions

• Boil large pot of water
• In a saucepan on low-medium heat, melt butter with sage and garlic until butter browns. Then remove from heat
• Cook the potatoes and cabbage in the boiling water about 5 minutes, add your buckwheat pasta to the same pot and boil until pasta cooked. Drain off all liquid.
• Add the pasta, cabbage and potato back to the pot and mix in the butter mixture.
• Then mix in the grated cheese.
• Mix on low heat until cheese is completely melted
• Season to taste. FYI, I didn’t add any salt because I found the cheese to be salty enough.

Sunday, November 27, 2011

Eggplant Milanesa


I spent a few months in Buenos Aires in 2007 interning at a legal NGO. The experience was one of my more mixed ones travelling. It was, like most travel, enriching, yet those months were not one big metaphorical heap of grilled blood-sausage (remember, we’re in Argentina, so to most people blood sausage is a very very good thing).


Let me start with the more sordid: I got hooked on watching Falcon Beach while drinking inexpensive Argentinean wine alone in my apartment using what was essentially a hospital gurney as a couch. I never really demystified the phenomenon of rampant Canadian TV in Argentina but in all honestly I think that Canadian broadcasting has met more success in the Southern Cone than it has in Southern Ontario. Godiva’s, ENG and Falcon Beach among shows that I didn’t even know existed and whose names I have long since forgotten. Prime time, late-night, reliable and constant, Argentina has met the Canadian-content quota.


One of the prominent high points was the food. Every economic meltdown has its silver lining (people, I’m joking) and the crisis, which reduced the Peso to a fifth of the value of the Dollar, made eating in Buenos Aires more than affordable for a Canadian gal irresponsible with her student line of credit. I could eat out, often with my buddy Kate, whenever I wanted, comforted by the knowledge that the bill would have no impact on me until one-year after graduation when the grace period expired. Yes, I can now see the error in this logic.


And thus we arrive at eggplant milanesa. I ate eggplant milanesa almost every day for lunch at work for $1.00. While the dish sounds and looks mighty Italian (probably because a large percent of Argentines are of Italian descent), it is unmistakeably Argentinean cuisine (although not necessarily on ciabatta with tomato sauce). And in a country seriously committed to beef, it was incredible to witness how much breaded eggplant those people ate.


In the spirit of food-blogging-integrity, I got the ciabatta and milanesa recipes off of random websites. I wish I could remember who I poached them from so that I could give credit where it’s due. And in that vein, the tomato sauce was my own invention.


Ciabatta Bread

Ingredients
• 1/8 teaspoon active dry yeast
• 2 tablespoons warm water (110 degrees F/45 degrees C)
• 1/3 cup warm water
• 1 cup bread flour
• 1/2 teaspoon active dry yeast
• 2 tablespoons warm milk (110 degrees F/45 degrees C) (Note to readers: I just used warm water. Who has the energy for a thermometer?)
• 2/3 cup warm water
• 1 tablespoon olive oil
• 2 cups bread flour
• 1 1/2 teaspoons salt

Directions
• To Make Sponge: In a small bowl stir together 1/8 teaspoon of the yeast and the warm water and let stand 5 minutes, or until creamy. In a bowl stir together yeast mixture, 1/3 cup of the water, and 1cup of the bread flour. Stir 4 minutes, then over bowl with plastic wrap. Let sponge stand at cool room temperature for at least 12 hours and up to 1 day.
• To Make Bread: In a small bowl stir together yeast and milk and let stand 5 minutes, or until creamy. In bowl of a standing electric mixer fitted with dough hook, blend together milk mixture, sponge, water, oil, and flour at low speed until flour is just moistened; add salt and mix until smooth and elastic, about 8 minutes. Scrape dough into an oiled bowl and cover with plastic wrap.
• Let dough rise at room temperature until doubled in bulk, about 1 1/2 hours. (Dough will be sticky and full of air bubbles.) Turn dough out onto a well-floured work surface and cut in half. Transfer each half to a parchment sheet and form into an irregular oval about 9 inches long. Dimple loaves with floured fingers and dust tops with flour. Cover loaves with a dampened kitchen towel. Let loaves rise at room temperature until almost doubled in bulk, 1 1/2 to 2 hours.
• At least 45 minutes before baking ciabatta, put a baking stone on oven rack in lowest position in oven and preheat oven to 425 F (220 degrees C).
• Transfer 1 loaf on its parchment to a rimless baking sheet with a long side of loaf parallel to far edge of baking sheet. Line up far edge of baking sheet with far edge of stone or tiles, and tilt baking sheet to slide loaf with parchment onto back half of stone or tiles. Transfer remaining loaf to front half of stone in a similar manner. Bake ciabatta loaves 20 minutes, or until pale golden. Cool loaves on a wire rack.

Eggplant Milanesa

Ingredients:

• Breadcrumbs: 2 cups
• Eggplants: 2 medium size
• Parsley: 2 tbs.
• Eggs: 3
• Garlic: 2 cloves
• Salt and pepper: to your taste
• Olive Oil: 1 tbs.
• Lemon: 1/2

Optional:

• Tomato sauce
• Mozzarella cheese

Directions:

• Thinly cut the eggplants on the long side, about 1 cm thickness.
• Place the eggplant slices on a plate and sprinkle with salt. Let them sit for about 20 minutes or until you see the eggplants releasing moisture. Pat the eggplants dry with a paper towel.
• Chop finely the garlic and parsley.
• Wisk the eggs and add the garlic, parsley, salt and pepper.
• Place the breadcrumbs on a large plate.
• Pass the eggplants through the egg mixture until they are wet. Cover both sides of each eggplant slice with breadcrumbs (lightly patting the breadcrumbs to have them stick to the eggplant).
• Spread olive oil on cooking sheet and place the eggplants one next to the other. Cook in the oven at 350 until they are golden.


Tomato Sauce

Ingredients
• Canned crushed tomatoes (some? Say ¼ or 1/3 of the can?)
• 3 cloves garlic (finely chopped)
• 1 onion (finely chopped)
• Dried basil and oregano (use a heavy hand)
• Salt and pepper to taste

Directions:
• Fry onions and garlic in grapeseed oil for a few minutes
• Add crushed tomatoes
• Add basil and oregano and seasoning
• Simmer for 25 minutes

Saturday, October 22, 2011

Fish Cakes

This past August I went to Nova Scotia for the seaside wedding of dear friends. It was an extremely wonderful few days: such great people, so many little bunnies, the ocean and, of course, its progeny.

One of the many things I’d been looking forward to before getting on the plane was the chance, at long last, to eat myself into a cheaper-than-in-Ontario lobster coma.

I had never really eaten lobster and had been acutely aware of it for years. I’d been told legends of lobster eating on a family vacation to Montauk when I was 3, but other than that, it was just the occasional lobster spoon stealthfully eaten at a catering gig. I needed to eat lobster, but didn’t want to pay anything close to what I would have to locally. I had become so desperate that on my bad days I even entertained Red Lobster.


On my second night in the Maritimes, Katie’s and Jay’s families hosted a lobster fest. I sort of (and sort of don’t) wish I had a keep-sake from that bucket-list evening: I have not a single photo and couldn’t in good conscience keep the bib (they were given to everyone, not just me). I’ll just have to survive with my memories of lobster tails and claws as far as the eye could see.

Back in Toronto, I found myself in a predicament: I wasn’t going to buy lobster for this homage. I also ruled out chowder because I could not bring myself to pour a litre of whipping cream into a pot of soup. Although apparently ordering it in a restaurant is fine as is drinking lattes made with 18 percent cream.

After limited and painless deliberation, I settled on fish cakes. I didn’t eat fish cakes in Nova Scotia but making them did, curiously, bring me back to those idyllic four days.


At the eleventh hour, I decided to make tartar sauce. I still haven’t looked up the recipe, so take this with a grain of salt, but a little voice in my head kept telling me to mix mayonnaise, horseradish and relish. Since I didn’t have relish I chopped up bread & butter pickles instead. Quite honestly, I can’t decide which I enjoyed more, the tartar sauce or the fish cakes. The little voice was trustworthy.


FISH CAKES


Ingredients
• 2 fillets cod (or any other type of fish, typical or not)
• 3-4 potatoes
• 2 eggs
• 2 green onions, minced
• 2 garlic scapes, minced
• Salt and pepper
• Flour
• Vegetable oil

Directions
• Boil potatoes
• While the potatoes are boiling, season the fish and fry until cooked
• In a bowl or food processor, mash together the fish, potatoes, eggs, green onion and garlic scapes and season with salt and pepper
• Make the mash into patties and coat with flour
• Fry the patties until brown.


TARTAR SAUCE

Ingredients

• Mayonnaise, a blob/dollop
• Horseradish, a smaller blob/dollop
• Bread & butter pickles (finely chopped) or yum-yums or relish

Directions

• Mix ingredients in a bowl

Sunday, September 25, 2011

Watermelon and Feta

The summer of my 17th year, while sitting at a sea-side café on the beach of Tel-Aviv, feet in the sand, I had a revelation. It was a revelation that spawned not from any conventional religious experience per se but from the simplest of acts: eating a plate of watermelon and feta cheese.


Admittedly, the night was memorable for more than just the food: it was in Israel, where I had also travelled at 15, that I experienced freedom and independence for the first time. In hindsight, I think that every step I took in that country as a teenager was adorned with magic. Having said that, I have had many wonderful and defining moments in Israel over the years, from hiking in the Negev desert, to exploring archaeological excavations, to a short stint studying law at the Hebrew University, to running around Tel-Aviv day and night, to spending time with wonderful family and friends and of course to being asked hilariously personal questions, often very thoughtful, by abject strangers from the nation of people who know no social boundaries, to name only a few.


Of the defining moments, that night was one. When I eat, or think of eating, watermelon and feta, I always think of that summer night and countless others like it.


In case it isn’t clear, the revelation was that watermelon and feta are an incredible combination: my introduction to the sweet and savoury union.


Since my awakening, it’s been sweet and savoury this and sweet and savoury that. I’ve had the underwhelming Nature Valley Bars (be warned! The balance is off! You can hardly taste the savoury!) and the unquestionably successful Lindt sea-salt chocolate. Lindt was right on the money as were the guys who invented maple syrup on bacon. In fact, just last night I had maple bacon ice cream (Ed’s Real Scoop) and while I entered the situation a skeptic, I came out a believer.


To be fair to other sweet and savoury combos, part of what gives watermelon-feta its winning edge is the genius at play with texture and “state”. Watermelon is essentially a sweet liquid and feta the saltiest and chalkiest of them all. The watermelon cuts the intensity of the feta perfectly. It’s catharsis at its best.


That’s really the essence of this post. Perhaps you’re thinking, “Leora, dedicating an entire 500 words to such a simple dish is crazy.” You may also be thinking, “Leora, dedicating an entire 500 words to such a sublimely simple dish is sheer brilliance.” And I think it’s open to debate which of you are correct. Let me get the dialogue flowing: on the one hand it’s true; there is nothing creative or particularly skilful in slicing up watermelon and feta and eating them in concert. On the other hand, simple food is almost always amazing and almost all amazing food is pretty simple.


If you fall in the “crazy” camp, you can jazz up your watermelon and feta as a salad. I’ve in the past added red onion, kalamata olives and a drizzle of olive oil. This time I’ve added nothing. It was smouldering outside when I made this (clearly I did not make this today) so you can imagine how refreshing it was.


No recipe needed this time.

Tuesday, August 23, 2011

Falafel


I’m the farthest you can get from a picky eater but I’ve never been a fan of falafel. I’ve stared many a falafel square in the eye (I always blink first) but am always more contented with a pita stuffed with an array of eggplant salads, coleslaws, pickled veggies, grilled veggies, hummus, tahina and hot sauces. You can imagine my surprise when I ate that falafel in Amman. … [tangent/flashback begins]


… In the summer of 2005, while waiting on foot at the Israeli-Jordanian border on what I had thought was to be a 3 day excursion to Petra, I met and tagged along with an Israeli off-road jeep tour that did take me to Petra, but also all over the Arabian desert, Wadi Rum, Aqaba and Amman. What an incredible trip. When I think of my time in Jordan, I always think of the listless, silent and smouldering sand dunes of the Arabian desert and the contrasting bustle and vitality of downtown Amman.


The food, on the other hand, is one of the last things to come to mind … with the exception of the goat brain (and the falafel, of course). The goat brain can be chalked up to the fact that I’m not one to shy away from eating something new and maybe more so that I could not say no to the exuberant and friendly restauranteur at what appeared to be the only restaurant in the world, planted somewhere in a seemingly endless desert. I always think of the goat brain. Not because I liked it but because I didn’t. It was the texture. If you are interested in preparing goat brain at home then I suggest you google a recipe as this gal is not inspired to recreate that experience. …


… That 25 cent Amman falafel sandwich was hands-down my most delicious meal in Jordan (I already feel guilty writing this I mean I DID eat other decent meals it wasn’t like I was nauseated left right and centre just nothing other than the goat and the falafel really wowed me – for different reasons - and maybe I was eating in the wrong places, who knows). I remember my surprise at how delicious the falafel was, which by then I had been consciously avoiding for probably 15 years. Thinking back, the spice blend must have been impeccable and the chickpeas fresh (or at least freshly fried) but at the time I could only attribute the agreeableness of the flavour to its un-constant variable - the fried onion centre of each falafel ball.


My Amman experience gave me renewed faith in that great Middle Eastern street food. While falafel is pretty abundant in Toronto (to grossly understate its presence), I have never since had falafel that I liked as much and have continually made sense of this as the absence of the fried-onion centre. … [foreshadowing].


I therefore set out to recreate my perfect falafel, stuffed with fried onion. Along the way, I decided to make the pita, babaganoush and tahina that you see in the picture too. I've adding another very similar photo to the one above to break up the post.


Making falafel was easier than I had expected. Other than soaking the chickpeas overnight, the dough took little time to prepare. The only unpleasant part of the experience was the frying. For some reason the oil kept detonating and splattering everywhere which is scary. It was only when all the balls were ready to meet their certain death in that pot of crackling and blistering oil that I realized that I had totally forgotten about the fried onions. In an adrenalin-induced reaction, the kind reserved for executing extraordinary physical feats in the face of mortal danger, I chopping some red onion and stuffed it, raw, into the centre of some of the balls. After all of my efforts, it wasn’t going to be like in Jordan at all.


The happy ending is that I had been wrong! The secret was not in the fried onion! The symbiosis of the garlic, the parsley, the savoury spices along with the sweetness of the chickpeas was an absolute success. The falafel was completely delicious. I’ll be making them again but next time in the oven. The pita, babaganoush and tahina were not nearly as treacherous.


Falafel

Ingredients


• 1 cup dried chickpeas
• ½ large onion
• 2 tablespoons parsley
• 2 tablespoons fresh cilantro
• 1 teaspoon salt
• 1 teaspoon chilli pepper flakes
• 4 cloves garlic
• 1 teaspoon cumin
• 1 teaspoon baking powder
• 6 tablespoons flour
• Soybean or vegetable oil

Directions

1. Put chickpeas in bowl and cover with cold water. Soak 12-24 hours and drain. (You can also use canned chickpeas).

2. In food processor, blend (not puree) chickpeas, onion, parsley, cilantro, salt, chilli flakes, garlic and cumin.

3. Add baking powder and flour and blend. Dough should not stick to your hands. Add more flour if need be. Cover and refrigerate for a few hours.

4. Form dough into small balls.

5. Heat 3 inches of oil to 375 degrees in a deep pot or wok. Fry balls in batches - a few minutes on each side until golden brown. Drain on paper towels.

Pita
Ingredients

• 1 1/8 cups warm water
• 3 cups all-purpose flour
• 1 teaspoon salt
• 1 tablespoon vegetable oil
• 1 ½ teaspoons white sugar
• 1 ½ teaspoons active dry yeast

Directions
1. Mix ingredients together and let rise 2 hours (or if you are like me, add way more active dry yeast and let it rise for ten minutes)
2. On a floured surface, divide dough into 8 balls.
3. Roll each ball into a 6 to 7 inch circle. On a floured surface, cover with a towel and let rise about 30 minutes until slightly puffy.
4. Preheat oven to 500 F. Place 2 or 3 pitas on a wire cake rack directly on oven rack. Bake 4 to 5 minutes until puffed and tops begin to brown.
5. Remove from oven and immediately cover with a damp kitchen towel until soft.

Babaganoush

Ingredients

• 3 eggplants (small)
• Olive oil (for brushing eggplants)
• Salt and pepper
• Red chilli flakes (to taste)
• 2 tbsp cilantro
• 2 tbsp oregano (fresh)
• 1 garlic clove
• 3 tbsp lemon juice
• 4 tbsp olive oil
• Sea salt
• Ground pepper

Directions
1. Preheat oven to 450 F.
2. cut the eggplants length-wise into halves, brush with olive oil and sprinkle with salt and pepper
3. Bake for 15-20 minutes until eggplants are completely soft
4. Blend the eggplants with the chilli flakes, cilantro, oregano, garlic, lemon juice and olive oil in the food processor.
5. Season to taste

Tahina
Ingredients

• 1 cup water
• 1 cup tahina paste
• ½ cup fresh lemon juice
• 2 garlic cloves, crushed
• 1 tsp salt

Directions

Mix ingredients together in a bowl. Got it?